Safety Lamps Repair

adminpost

Installing Under-Cabinet Lighting: A DIY Project

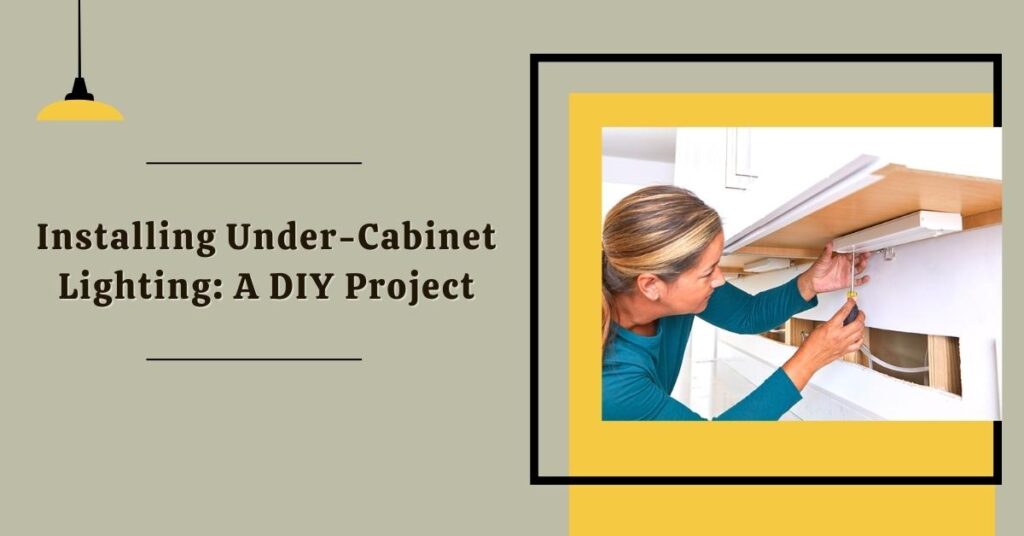
Planning to remodel your kitchen space to make it look better and make your work easier? Then it’s time to install under-cabinet lighting as an additional for the accent illumination in your kitchen. It lets you light up the room without turning on the entire lights.  If this lighting installation seems like you want to have in your space, but you haven’t planned any extensive renovations, don’t worry. Because installing under-cabinet lighting doesn’t require significant renovation work, it can be done by following a few general steps. Let’s have a look! How To Install Under-Cabinet Lighting? Under-cabinet lighting below upper cabinets offers additional lighting on the below counter’s surfaces. It is crucial while you are working with knives or other edged kitchen utensils. Here is the guide that walks you through the DIY levels on installing under-cabinet lighting quickly. Also Read:- The Best Home Lighting Repair Service In NY Pick The Right Fixture Firstly, pick the appropriate fixture according to your space. The selection procedure of fixtures should be done considering several factors such as Dimension of space, Dampness of place, colour or type of fixtures, and adaptability. Gather The Essential Tools And Materials Firstly, you must gather all the essential tools and materials required for under-cabinet lighting installations. Tools needed while installing under cabinet lighting are – Voltage tester, Cordless drill, Jigsaw, Hacksaw, Wire stripper/cutter, and Non-contact voltage tester. And materials that are required for under-cabinet installation are – a junction box, undercabinet lights, Wire nuts, remodeling switch box, 1/2” metal flex cable, 14/2 plastic-sheathed cable, Cable clamps, 1-1/8” spade bit, flex connectors, 1-1/8” spade bit, Fish tape and flex connectors. Switch Off Power And Follow Safety Measures Before starting the procedure, looking after the power board and turning off all the power switches is vital. You can use a voltage tester to ensure that power is off to all cables. Also, wear safety goggles while working with power tools to secure your eyes. Ready The Wall And Cabinet Pick a wall or cabinet and plan the procedure of wiring where multiple holes can be covered at the end of the procedure. If the surface backsplash can be removed, remove it and make a passage in the plaster or drywall that the backsplash can cover. You can implement power drills to make holes in the studs to hold wires or mount tile between the wall cabinets and countertop to shield cuts and holes. Evaluate every light to decide where the wires will enter and make an exit. Make small holes or openings in the wall where the wires will enter the lights. Ensure that the gap will get covered when the light installation is done. Also, if you cannot detach a backsplash, give some time for wall painting and patching after the installation. Insert A Hole To Place The Switch Box Now it’s time to make an opening or a hole for the switch box and move wires through it from a power board. Do not attach the wires to the power yet. Run these cables from the switch box to the opening for the first light, first to second, and so on. Let’s take 16 inches of wires swinging from spaces, so you have multiple slacks to form connections.   Install The Lights Pick the lights and remove their lens and fluorescent pipe. Protect each wire from the light while attaching the cable to a box. You will need the help of a third person to hold the light while you are working with the screws through the light or the cabinet. Also, ensure that the screws would not tap through the cabinet’s interior. Light Wiring Then wire the lights so that they won’t pop within the ballast. Join cables with the light’s leads inside, white to white and black to black. Place the cables on the foot so they won’t get in between while installing the fixture’s body. Slightly push the base of the light into its place. If it is difficult to push it, place it down and reorganize the cables for simple fitting. Fix the fixture base. Wiring Of Switch Now mount the switch box with the wires joined on it. Join the white cables with each other and connect each black cable with a single-post switch. And attach the ground wires to the box and switch if metallic. Cover the switch’s terminal with electrical tape. Power off the junction box or holder that will transmit the power. Join black-to-black or color cable and white with only white cables and restore power. Move Cables Inside The Cabinet Make holes or openings in the cabinets to quickly complete the installation procedure. Set MC or BX wires on the inside. Take a tape measure to decide where the wires will enter each light at the cabinet’s base. You have to cut the wires correctly because you can’t slide the spare wire into the wall case. Run Wires Under The Cabinet Another easy installation method is to fix or run the wires below the cabinet if allowed in your area. Connect the lights with string wires below the cabinet to install the wires. Staple the wires using cable staples. Carefully measure and cut wires so they get flat across the length. Examine your local rules before continuing the procedure. Self-Fixative Lighting Not every under-cabinet lighting needs tough -wiring. Several fixtures insert into the cabinet’s underside through the strong cohesive. Usually, these fixtures need LED lighting and batteries. To mount one of these lighting fixtures: Mark the center of the cabinet. Decide the light’s center point, and strip off the backing. Place the light to align the center points, then push it into place. The makers might offer to install screws for additional security. What To Look For While Hiring An Electrical Company? While looking for an electrical company or an electrician, there are some factors that one needs to consider before hiring; let’s know about them. Licensing  It is vital to hire an electrician from a reputed and

Installing Under-Cabinet Lighting: A DIY Project Read More »

Types Of Lamp Shades & Which One Do You Need

Isn’t it dreamy if you get the Retro or Boho vibes in your home? Sure it is. A lamp is a lighting solution that can fill any place with an aesthetic or retro vibe. The great quality of lampshades is that they stand the test of time no matter how many hours they work every day. Thus, if you are planning to liven up your place or give it a whole new look, buying lampshades is an important part of the process.   However, most people find choosing the right lampshade for their space difficult. It happens because most people are unaware of the different types of lampshades and where they should be used. Well, not knowing the types of lamp shades is completely ok if you are not into the lamp business.   Therefore, here we have compiled a list of all types of lamp shades so that you can make an informed decision about which lamp shade you should bring home.  Types Of Lamp Shades To help you choose an ideal lampshade for your hall or living room, here is a list of kinds of lampshades with their properties and a suitable place to fit in.  Also Read:- The Best Home Lighting Repair Service In NY Round Lamp Shades Round Lampshade is a family, and its members are Cylindrical, Drum, and oval lampshades. It is one of the most famous lampshades used worldwide for its aesthetic glow. Because of its narrowing depth, the lampshade is suitable for smaller spaces and versatile enough to go with glam, coastal and Bohemian interiors. Dome & Novelty Lamp Shades The Dome and Novelty lamp shades are typically created of ceramic, glass, or metal. This dome lampshade is shut at the top and reflects the light downwards at a surface if it is dingy and casts light all over the room if it is clear. It is usually implemented on above-light fixtures or huge floor lamps used for basic lighting. The novelty lamp shade is available in different shapes and sizes to carry a theme to the living space. For instance, the twinkle-shaped lampshade goes with the kid’s room. Fabric Lamp Shades Fabric Lamp Shades are made of different fabrics, such as linen and cotton. Shades can be a stark gray or white and feel contemporary, while spongy neutrals can feel traditional. The silk fabric in the lampshade gives it a refined and elegant look, and the bright metallic or sheen flecks provide glam to it. Using it will give your living space a farmhouse or rustic look. The fabric lampshades are also available in different catchy patterns like floral, Geometrical, and using ribbons on it. Glass & Metal Lamp Shades The Ceramic or glass lampshade has an adhesive base. The Dazzled Crystal lamp brings glam to the place, while Cut crystal shades offer vintage vibes. The Metallic lampshades are made of Chrome and Brass, which makes it a current showstopper.  Woven & Paper Lamp Shades The woven rattan, bamboo, caning, or seagrass lampshade can offer your area a boho, retro, and beachy look and a slatted or solid wood lampwork as an element of aesthetics. The textured or woven lamp shades signify warmth and interest in the living space. The loosely woven lampshade offers dappled light, so it is vital to check it first to see if it has been nicely woven. Empire Lamp Shade An Empire lampshade is a vintage shade that flashes its light on the bottom. It is available in different sizes, from mini wall shades to huge floor and table lamp shades. It is the best lampshade in terms of elegance and simplicity. Pleated Lamp Shade The Pleated lampshade is a traditional shade that has come back again from the past times. They come in a variety of patterns, sizes, and fabrics. The determining feature of this lampshade is that it has a solid covering of fabric all around the lampshade with a small-scale print. Mini Lamp Shade The Mini lampshade is specially made for wall scones and lampshade chandeliers. The wall can hold one or two lampshades, while the chandelier has the capability to carry up to eight of them. Mini shade comprises bell, empirical, and round-shaped lamps that are wrapped with solid fabric with a catchy floral print. This lampshade is perfect for placing in the dining room as it emits a bright glow to the space creating a nice eating ambiance. Bell Lamp Shade The Bell Lamp Shade is very much similar to an empire lampshade. This curve-shaped lampshade has a bell-like shade that flashes light below. It is a traditional lampshade that adds a decorative element to the space to give it a warm and cozy atmosphere. It is an excellent choice for ambient lighting. Square and Rectangular Lamp Shade The Rectangular and Square shaped lampshade is placed on floors or tables. Like the round lampshade, it has similar diameters at the top and bottom, emitting a lot of light. Its leveled sides look simple, clean, and uncluttered. Its flat sides look clean, simple, and clear and are an excellent option for a floor, bedroom, or accent light for your entrance console. Conclusion While choosing a lampshade, it is crucial to consider its size, color, and style to see if it will go to your living space. Also, the brightness of the light emits from the lampshades counts as some places require bright lighting while some look pretty appealing with dim lighting only. Above mentioned are the types of lampshades to simplify your decision If you are thinking of buying a lampshade for your place, Safety Lamps Repair is a place for you. We have plenty of lampshades of various shapes and colors from which you can choose the one that matches the needs of your living space. Apart from buying the lampshades, you can also count on us for their installations. Our full-fledged team of expert installation specialists provides the best service quality at affordable prices. To buy or install a lampshade, contact us

Types Of Lamp Shades & Which One Do You Need Read More »

The Best Home Lighting Repair Service In NY

If you own a house, you must be aware of the need for lighting services you get every now and then. Sometimes the electrical bulb gets fused, or sometimes the cords get damaged, and all these electrical issues need to get fixed timely, as delays could lead to some significant problems in the future that can cost you way more if the issue gets bigger over time.   It is vital to call out professionals for home lighting repair as they have enough knowledge and the right tools to deal with them. Also, seeking out the best home lighting repair service can give you a sign of relief from their work and eliminate the chances of further repair for a long-long time. Safety Lamps repair assures you great service when it comes to lighting repair. Whether lightbulb burnouts or fixture’s brittle wiring, we are up for all electrical repair services, even during the off hours. If you got stuck with bad lighting, we could be your saviour in such a delicate situation. When Should You Call Home Electrical Repair Services? Here are some noticeable symptoms that tell you about the need for repair in your home lighting. The most basic signs of damaged electrical and lighting issues include: Flickering You often noticed that your light bulbs and light fixture got dim and started flickering sometimes. It is an electrical problem that needs to repair immediately. Therefore, it is vital to call out professionals to fix it. Calling us to fix bulb flickering will give you A-one service quality and a sign of satisfaction. Lightbulb Burnouts If you are changing your bulb frequently, but it always starts burning out, there is an indication that there might be a problem with the whole lighting structure. It needs to be fixed on time because delays can cause many worst situations afterwards. Don’t worry; our experts are capable of doing the job with perfection.  Damaged Cords If the cables or cords of your light fixture have been damaged, it is vital to repair them immediately, as a delay in repairing them can damage the entire lighting system. We are up for solving every single lighting-related issue, whether it is cords repair or lighting installation.  Brittle Wiring Sometimes, the wiring of light fixtures automatically becomes fragile due to wear a tear. Also, the heat released by lamps over the years leads to brittle wire and damages the lighting fixture, which is vital to fix. Therefore by calling us out, you can transfer this concern to us, and we will be responsible for its overall repair work. Types Of Lighting Repair Services We Provide Whether it is residential or commercial space, lighting is one of the crucial requirements of every place. It is imperative to maintain a home’s aesthetic and function. Therefore, even a single issue in our lighting system must be fixed by experts, as bad lighting can impact the overall place and reduce its appeal. To get the repair service in or out of your space, consider Safety Lamps Repair, as we provide both of them.  Residential Lighting Repair Good lighting in your residential area allows home function and makes your space comfortable and appealing. A good lighting scheme comprises all the lamps and light fixtures. Therefore whenever any single issue is reflected in our lighting system, it impacts and disrupts our comfort. Thus, to easily escape such an uncomfortable situation, we help you by repairing the light malfunction and restoring your peace. Commercial Lighting Repairs The lighting requirement for a commercial is entirely different than for residential lighting. Industrialized lighting must be durable and powerful to reduce the frequency of bulb replacement. But sometimes, the excessive use and daily movement of lighting fixtures around the Warehouse can damage and break them that need to get fixed. Counting on us for commercial lighting restoration can give you the finest repair service and suitable lighting for your workplace. Also Read:- How To Install Ceiling Light Mounting Brackets? The Cost Of Electrician Per Hour Whenever you hire any electrician or lighting company for your electrical project, you must know about the labor charge you expect to give for their service. Depending on the complexity of your electrical project, one can expect to pay around $40 to $120 labor costs per hour. Also, your location, the required time, and the electrician’s reputation in the market are the factors that vary the charges. If you are seeking out for emergency callout, you have to pay around $150. Moreover, if you are calling out an electrician from a long distance, then his travel charges will also add up to his service charges, and you will have to pay all of it. Thus it is suggested to call out a nearby and trustworthy electrician for your electrical requirements to reduce your expenses. Also, one should properly compare and analyze several electricians and select one that offers guaranteed service at a great deal, just like Safety Lamps Repair does.  Why Choose Us? A broken or torn lighting fixture can be a big danger, and fixing it professionally and efficiently is crucial. Safety Lamps Repair is one of the best lighting repair service providers that are up for all kinds of lighting-related issues and services. We can give you 100% satisfaction with our work and can ensure that the work has been done correctly. Here are some qualities and key points of our services that make us distinct from others. Experience We are the most experienced and qualified leading lighting company in NY. Our team members have expertise in handling all kinds of lamps and lighting fixtures, from basic to advanced ones, including antique ones. Lamps Knowledge Our team has extensive knowledge of all kinds of lamps and fixtures. We can suggest the ideal lamp choice according to your space. Also, we can deal with every sort of lamp-related issue, like restoration or replacement.  Safety We ensure client safety through our work. Whether it is a restoration, replacement, or installation, we

The Best Home Lighting Repair Service In NY Read More »

How-to-install-outdoor-wall-lighting

How To Install Outdoor Wall Lighting?

The best way to highlight the hard work you have put into your garden, patio, and barbecue island is by lighting up your outdoors. A good lighting setup can bring out the best in the ambiance and set the mood for any occasion. One must play with the illumination and show off the decorated outdoors by choosing the right lighting.  In addition to that, a well-lit place is always a more secure option. No matter how smooth your pathway is, there is always a chance for injuries. Moreover, dark areas are like open safes for burglars and prowlers. Switching to an illuminated outdoor space will keep intruders away from your house.  Do you need help with the right kind of lights, or do you want to know about installation? We have everything answered for you, from how and where to install outdoor wall lighting to its types and services. Types Of Outdoor Lights  Talking about outdoor lights, you must understand that you have a long list of vast options. As lighting isn’t something that is new to the world, there have been many innovations in it.  So, considering we are talking about outdoor lights options, primarily there are three types of outdoor lights: Task Lights These are additional lights added for a specific task. Small objects or low-contrast objects can be seen easily with these lights.  Ambient Lights These provide indirect lighting that gives out a soft look to the ambiance. Ambient lights give an overall brightness to the area without glare. General outdoor settings look great with ambient lights. Accent Lights Accent lights are perfect for highlighting a particular focused feature. Pathways, landscaping, and entry doors are great spaces for accent lighting. Tips For Outdoor Lighting in Different Areas So, since you now know about the types of outdoor lighting, you must be looking for some ideas which can help in using these lights effectively.  You don’t have to look elsewhere to get ideas for outdoor lighting. Follow the directions to get better outdoor lighting: Outdoor Wall Lights For The Garage The right kind of light is most important for the garage area. Bright lighting is preferable near the garage for safety. Also, an important thing to remember while setting up the lights in the garage area is the convenience and the positioning of shadows. Your garage does not only store your cars, but it also leads the way inside the house. Hence, putting the right light on is essential.  A single-side lantern is suitable for a small car size garage. Three lights are recommended for more spacious garages, one in the center and two on either side. Outdoor Wall Lights For The Entry Area The entry is the most critical area of the house. It has to be the primary focus while setting up the lighting. Everyone wants a gorgeous entryway as it gives the impression of the house. The entry area needs good lighting, mainly for safety purposes, and aesthetics are added benefits to it. In addition, an important thing to keep in mind while choosing the lights is the height of the doors and walls.  Outdoor Wall Lights For The Patio And Garden  The most relaxed area of the house is the patio area. This is where family and friends come and spend quality time together. Therefore, the lighting has to be relaxed yet efficient. 2–4 fixtures at a height are generally suitable. Multiple lights should be added for larger spaces. Moreover, adding colors and different shapes of light sources are a great way to add fun elements.  Read More:- How To Install Ceiling Light Mounting Brackets? Reasons Why You Should Opt For Professional Help This is just the first step; installation and mounting are several steps. Holding a manual in one hand and a screwdriver in the other while balancing on a ladder is already enough work. Taking professional help can make the whole task easy.  Hassle-Free Professional help in installation ensures the convenience of the homeowner. Experts perform the installation and mounting. Moreover, the entire process gets done safely. You can avail of the service anytime and according to your needs.  Cost-Effective A professional offers value for money service. You can avail of the service according to your convenience. It saves a lot of money from buying the required tools and machinery. Therefore, it is both cost-efficient and energy efficient.  High-Quality Work When you look for professional help, high-quality work is guaranteed. A professional knows the job and ensures the best quality work. Years of experience and knowledge gets reflected in work. In short, professionals provide perfection in the service.  How To Install Outdoor Wall Light? Installation of lights outdoors is a challenging task to perform, but if you are determined to do so, here are a few steps for you to follow: Step 1: Laying Out The Electrical Wiring  Firstly, mark the route of the electric cable Then, identify the underground lines Next, dig a trench along the route of the wiring After that, lay the cable on the trench Step 2: Connecting The Wires To The House Firstly, strip the end of the cable Then, attach the exposed ends of the wire to the transformer Next, hammer a wooden stake into the ground and screw the transformer Step 3: Install The Fixtures Of Light Firstly, place the fixtures where you want to install them Then, make a hole where you want to put the fixtures. Next, connect the main cable with the wires of the fixtures After that, attach them to the stake Now, plug the transformer to test the lights Finally, burry the exposed wiring Some Additional Important Tips There are different types of lights, and each type has another installation method.  Do read the manual that comes with the lights.  Wear protective gear before starting work.  Best Outdoor Wall Lighting Installation Service In New York. How do you define ‘best service’? Quality of work, cost efficiency, expertise, and convenience come at the top of the pyramid while defining the

How To Install Outdoor Wall Lighting? Read More »

how-to-install-ceiling-light-mounting-bracket

How To Install Ceiling Light Mounting Brackets?

Whether you are installing light fixtures, Shade sails, fans, and a track system, the important thing is to make the base first to hang them. And what is this base called?- Mounting Bracket. The Mounting Bracket supports every piece of hardware, majorly metallic. These brackets come in different materials like Stainless steel, Aluminum, Galvanized steel, and many more. The brackets can be fixed on every room wall, including the ceiling. Let’s learn about the use and benefit of installing mounting brackets at your place and how to install ceiling light mounting brackets. Kinds Of Mounting Brackets There are various mounting brackets in shapes, sizes, and uses. Each has some pros and cons. The basic types among all mounting brackets are  C-Bracket The C-bracket is one of the most basic mounting brackets. It is C-in shape and can be connected to wooden or metal ceiling joists, according to your preference. It is very simple to use and can be used with light fixtures for up to 10 pounds only. J-Hook Bracket The J-hook mounting Bracket has the shape of the letter “J.” Its properties are the same as the C-Bracket as it can also be attached to both wooden or metal ceiling joints for lights weighing up to 10 pounds. It is also very easy to use, like C-Bracket. The only difference is of shape they both have. Offset Brackets The Offset Brackets help fix light fixtures at an appropriate angle. This Bracket is connected to the ceiling and the fixture’s joist. It can set the light at a right angle or the ceiling’s edge. U Shaped Bracket The U-shaped Bracket connects the light fixtures to the woody ceiling joist. It can hold lights weighing up to 50 pounds. Its models are available in both plastic and metal. L-Shaped Bracket The L-Shaped Bracket can also help to install a light fixture on the ceiling. While using this Bracket, you have to make two minor cuts in your ceiling tiles to support the brackets’ arms. Pole Mounting Brackets The Pole Mounting Bracket is a bit different from others as it attaches the lights to the post or a pole. It can hold up to the weight of 50 pounds of lighting fixtures. It is available in both plastic and metallic models. What To Look For Before Installation Of Ceiling Light Mounting Bracket? Here are some important things to consider while installing a Ceiling Light Mounting Bracket: Select the Right Locations While selecting the location for installing the mounting Bracket, a few things must be considered. Firstly, ensure a sufficient gap between the mounting Bracket and any barrier above it, such as vents or piping. Secondly, you have to check if the mounting Bracket is in the right place where it can be fixed safely. Check The Fixture’s Weight  Another thing to consider is the weight of the lighting fixture that a mounting bracket can hold. Ensure that the capacity of the Bracket matches the weight of the fixture for smooth installation. Otherwise, it will crash down and cost you more to install a new one. Consider The Mounting Bracket’s Size  It is essential to check the size before purchasing the mounting Bracket. Ensure that the size of the lighting fixture goes with the size of the mounting Bracket. Otherwise, it will be a challenging task for you to install it. Check The Space Between The Ceiling And The Floor Checking the distance between the floor and the ceiling is also very important in mounting bracket installation. It will assist you in deciding the size of the Bracket you require. Check The Mounting Bracket’s Security Rating It is essential to check the safety rating of the mounting Bracket before its installation. For instance, several brackets support light fixtures with specific wattage, while some might not be appropriate for moist environments. Check the Availability Of Any Power Source  Lastly, you should check the power source. And you can check it by placing the breaker box to see which buttons are on. The power is available if you find any switch near the light fixture. And if not, call an expert electrician to install that power switch. Read More:- Types Of Chandeliers: Which One Will Suit Your Space? How To Install Ceiling Light Mounting Bracket? Here are the steps that one has to follow while installing a Mounting Bracket. Check the Gap Between the Joists Start by measuring the distance between the joists, which is crucial. Then place the mounting brackets evenly between the joist’s space. Also, go through the maker’s instructions to ensure the Bracket’s size matches the light fixture’s size.  Mark the Spot Of The Mounting Bracket Use the Level to mark the ceiling’s spot where the mounting Bracket will be placed. Ensure the marks are drawn straight for easy understanding. Also, pick a pencil to outline around the outside of the Bracket.  Make Holes in the Ceiling The next step is to drill or make an opening in the ceiling for the mounting bracket installation. Check if the drill is the same size as the screws while working with mounting brackets. Make an opening or a hole at all four corners of the Bracket. Fix the Bracket to the Ceiling Now you have to install the mounting Bracket to the marked ceiling. Place screws in the drilled holes and use a screwdriver to tighten them up. Before tightening them, make sure that the mounting Bracket is straight and leveled. Install the Light Fixture The last step is to follow the manufacturer’s instructions and install the light fixture accordingly. Also, ensure that the wiring has been done perfectly and the fixture is connected to the Bracket securely. Tips To Install Ceiling Light Mounting Bracket Below are given several tips that one should consider while installing a Ceiling Light Mounting Bracket: Use Level to mark the spot to fix the Ceiling Mounting bracket.  Ensure the screws are so tight that they won’t allow the movement of the Bracket. If you are considering an

How To Install Ceiling Light Mounting Brackets? Read More »

types-of-chandeliers

Types Of Chandeliers: Which One Will Suit Your Space?

Do you want to make your space appealing so you can invite someone for coffee or host dinners that everybody would remember? If yes, here is what you can do! If you wish to set the classy tone of your space or you want to grace your hallway, a chandelier is a vintage choice to fulfill this. A chandelier’s charm and energy can convert your place into a dream place. It always catches your eye and balances the proportion of a space. But nowadays, chandeliers are available in many types and models. So you need to know which kind of chandelier will suit your place. To make your decision easier, here is the ultimate guide to the types of chandeliers you can choose for your space. What Is Chandelier? The chandelier is a light fixture with many lamps and tiers providing enveloping lighting in a particular space. There was a time when the existence of a chandelier symbolized wealth and power. But now, even a middle-class person can also afford to place it in his room as a source of lighting or decoration.  The chandelier is of bronze, wood grain, brass, glass, crystal, and rustic iron. Also, it comes with various tiers representing the lighting layer varying from one to five. To upgrade the interior design, you can place the chandelier anywhere in your house, such as in the bedroom, dining room, drawing room, or courtyard. Types Of Chandelier As we know, plenty of options for chandeliers are available in the market. Here is the list of types of chandeliers that are very popular. Candle-Style Chandelier The ideal candle-designed chandelier brings formal appeal and heritage to any room. It gives the room a rustic look. As it is not huge, it does not require a large space to fit in. It is available in various styles and materials, featuring candelabra-like arms that comprise faux candles. This chandelier has a minimum of five extensions with a candle-like light. Also, some of them have a lighting frame that imitates the original candlelight. Shaded Chandelier The shaded chandelier is a type of chandelier in which the brushed glass surrounds the individual lights. It is available in multiple styles, from classic to modern. And it produces dimmer and warmer light in comparison to candle-style chandeliers. The shades can be facing anywhere, downward or upward, opaque or transparent, and straight or fluted. For an impressive look, you can also hang the matching curtains in your room, as it will balance the tone of your space with the chandelier. Read More:- Cost Effective Chandelier Repair NYC | Safety Lamps Repair Drum Chandelier The drum chandelier is a drum-shaped or cylindrical shaped chandelier. It consists of a large shade holding a light series at the surrounding. This chandelier is ideal for kitchens, bathrooms, bedrooms, and living rooms, as it produces dimmer light. It can be made of either fabric or metals. And it gives a very romantic glow to any space. Sputnik Chandelier The Sputnik chandelier is an Avant-garde and Modern chandelier that produces magnificent accent lighting, which is ideal for contemporary settings. The model of this chandelier is like a pivot crown or sun-burst shape surrounded by light bulbs that emerge from the middle spines. It is an excellent choice for your home interior.  Crystal Chandelier The broad Crystal chandelier is made from crystals and can take various forms. Place this chandelier in your space if you are looking for pure elegance. It is the perfect chandelier for places like the living room, dining room, and spiral stairways. This chandelier is not ideal for a bedroom set as it is a little flashy. The popular pattern in crystal chandeliers is the raindrop chandelier. Caged Chandelier  In the caged chandelier, the light is fixed at the center of the fancy cage and gives a very tangled design to the model. You can get these cages in different styles and shapes; some are basic, while some are made with an abstract approach like “a circular cage.” This chandelier captures people’s attention and gives your place a stunning look. It gets hung on the main entrance door to welcome guests because of its appealing or attractive look. Also, it is suitable for places like the kitchen, living room, and dining room, but it won’t go that much with the bedroom set because of its unusual pattern. Tiered Chandeliers If you are looking for a striking pattern, you should go for a tiered chandelier. It’s available in distinctive styles or models. It requires a lot of space to get fixed, so think about it only if you have ample space to hang it. It is an ideal chandelier for entryways, dining, and living rooms. Antler Chandeliers The Antler chandelier gives a rustic look to your space, and it can transform it into a nature lover’s dream. It does not come in a wide variety, so you have limited options to make a choice. Luckily, the antlers are not authentic, so we can use them without harming wildlife. It is not an ideal choice for places like dining rooms or kitchens, as the vision of antlers may force people to drop their appetites. Also, as it does not require ample space, you can hang it anywhere, even in small areas. Glass Chandelier The Glass Chandelier is made up of glass shades, and it is the priority of many homeowners as it gives them a chance to be modest or as fancy as they want. It produces very bright shining light, and you can hang it in big spaces like halls to embrace it. It is available in different types or models, so you have plenty of options to choose from. Globe Chandelier The globe chandelier is globe-shaped and created with strings of lights, usually packed in some material or cage to produce an effect of a globe. This chandelier pattern is modern, and its cages are generally metallic. Conclusion Chandeliers are the instant solution to modify your place to the

Types Of Chandeliers: Which One Will Suit Your Space? Read More »

What-Is-A-Tiffany-Lamp And-Where-To-Buy-It

What Is A Tiffany Lamp And Where To Buy It? A 101 Guide

People’s love for lamps is prominent, whether we talk about current times or the past. Lamps are there to illuminate your home and make it look unique and authentic. These light fixtures’ popularity increases day by day, and out of all of them, the Tiffany lamps stand out the most. If you are one of the lamp enthusiasts, you may have heard of the Tiffany lamp. These lamps were first introduced in 1895 and gained extreme popularity in the 19th and 20th centuries. Even today, Tiffany lamps are highly popular. Because of this, there are many pieces of it out there that are not the actual Tiffany lamps.  In many countries, these lamps are manufactured using the same techniques. And this leaves us with Tiffany lamps with no unique feature to compare them with the real ones. Identifying the real Tiffany lamps can be hard when you don’t know what goes into the real ones. However, we are just here to guide you on that. Let’s start by understanding a brief history of Tiffany lamps, their making process, and their different types. After that, we can learn how to identify a real Tiffany lamp and how much it costs to purchase a Tiffany lamp. So, let’s know how it all started! A Brief History Of Tiffany Lamps As per the latest information, it is suggested that Tiffany lamps were first introduced around 1895. It further mentions that its creator was Clara Driscoll, director of Tiffany studios, which was situated in New York. This studio was popular for its cutting, selection, and color of glass and for using it in shade designs of their own.  The original Tiffany lamps contained blown favrile glass and coiled bronze wire, which was Tiffany’s way of showing its cultural fascination. Reports suggest that originally Tiffany’s lamp design was inspired by nature. These lamps were consistent with their popularity throughout the period of Art Deco, in which highly prioritized ones were the geometric designs as they were the design of choice.  Tiffany lamps’ choice of design is the reason why they remain vibrant, stylish, and current to this day. In recent times, the term Tiffany lamp is common for any lamp that has the original Tiffany shade. It is made using stained-glass soldering pieces, which are turned into a design. Read Also:- What Is Track Lighting, And How Do I Get It Installed? What Is The Making Process Of A Tiffany Lamp? After learning about the brief history of Tiffany lamps, you might have questions about how Tiffany lamps are made. Well, the entire making process of a Tiffany lamp is divided into two parts, i.e., the design and manufacturing stages. The making process stays the same for all types of Tiffany lamps. To stick with the original design and authenticity, you have to use your hands to make them. You cannot manufacture Tiffany lamps using automated methods or machinery. Designing Stage The first stage of manufacturing Tiffany lamps is the designing stage. A professional artist takes responsibility for designing these lamps. If the design is approved, the process forwards to creating a model replica using wood. At present, plastic and cardboard are more common instead of wood. After the replica is made, it is overlaid with a cloth soaked in glue or resin, which helps in making the design stiffen.  Once the model comes in a dry state, the cloth is removed, and every piece is cut out. Later on, it is numbered and utilized in the form of a template for every glass piece that will be required for the manufacturing process.       Manufacturing process The foil method is the only method that is used for manufacturing all types of Tiffany shades, whether it is a floor lamp, table lamp, wall light, or ceiling light. For every type, size, and style, it is required to manufacture a different master mold. This mold is later covered in wax, and every glass piece is boarded with copper foil. Furthermore, it is laid on the wax and kept like that till shade formation. After that, glass pieces are hand-joined together to bring out the form of the shade.  Tiffany lamps which are made using original designs and manufacturing processes, will feel waxy. That’s why you have to clean them off before using them in your space. However, remember that is part of the process, so don’t think it is actually a fault from the manufacturing side. It just proves that the lamp is made using the traditional way. Different Design Types And Styles Of A Tiffany Lamp When you jump into the market of Tiffany lamps, you will find its various designs as well as styles. Every Tiffany lamp brings something unique, and which one you choose will highly depend on your preference. The most popular designs of Tiffany lamps are geometric, nature, and studio.  So, let’s see how they look and what makes one Tiffany lamp different from the other.  Art Deco or Geometric The Geometric designs of Tiffany lamps became highly popular during the period of Art Deco. These designs follow a repeated pattern and, most of the time, are symmetrical. Some of the Art Deco lamps follow a simple design, with the glass containing striking colors to bring out an effect. At the same time, some of these lamps are more vibrant and complex.  The unique selling point of these lamps is the use of striking and contrasting colored glass. Traditional or Nature The nature-style Tiffany lamps, also known as traditional lamps, were a few of the first designed lamps. These lamps come with floral, butterfly, and dragonfly designs and can be labor-intensive and complex sometimes.  By looking at one of the Nature Tiffany lamps, you will see how much work it takes to select, cut, and design these lamps by connecting each piece.  Tiffany or Studio Studio style showcases the original design of Tiffany lamps, which were designed by the Tiffany studio. One of Tiffany lamps’ most popular Studio styles is the dragonfly

What Is A Tiffany Lamp And Where To Buy It? A 101 Guide Read More »

Track-Lighting

What Is Track Lighting, And How Do I Get It Installed?

The use of lighting in your home has its obvious reason; you want to illuminate an area where you can perform whatever activities intended to be done there. However, the world of lighting is in no way limited, and there are multiple options for whether you need soft or bright light. And also, lighting is not always used for obvious reasons. People often look for lighting that can make their space look aesthetic and attractive to the eyes. With so many options for lighting online and offline, it is easy for you to get lost in the choices and conflict with your decisions. Furthermore, what you want from your lighting will also play a role in choosing. So, what if we talk about track lighting in particular? You should know that there are not only various options for them, but the information you will find about them is also unclear in most cases. However, there are obvious reasons why track lighting information is so conflicting. This is mainly because of the uniqueness of track lighting. But if you want a straightforward answer to what track lighting is, you will find it here today! Let’s end your confusion about what it is, its types, and how to install track lighting at home. So, firstly we will make you familiar with the meaning of track lighting, followed by its different types and installation process. What Is Track Lighting? Track lighting is a wall-mounted lighting system that uses rails or tracks to provide electricity down the whole line. Individual lights, also called track heads, can be fixed at any point down the track. Track lighting is categorized as directional lighting, as it illuminates particular areas instead of the room in general. Track lights work differently compared to the bulb lighting system. As you may have seen in normal lighting, the current passes through a single bulb only, but the case for track light is quite different. Instead of going to a single bulb, the current passes through the lighting fixture, known as rails or tracks. And from that rail, you will see the current getting distributed to the track lights connected to the line of the current. The best part about track light is that you can use your current effectively to illuminate the places you are currently using. This is not the case with normal lighting, where the space not even in use gets unnecessary illumination. If you are working in the kitchen, you will need the light to be directed toward your cutting board or whatever you are cooking. There is no need to illuminate the kitchen corners, which is the case in normal lighting. So, after understanding the meaning of tracking lighting, we must also study its various categories. What Are The Various Types Of Track Lighting? The basic idea around the working of track lighting involves using tracks and lights in its direction to give your space something unique. Over time, we were introduced to various kinds of track lighting which can suit individuals’ tastes as well as space. However, even when the working is the same, these types can offer something unique to your space. So, the tracks, which are commonly known as rails, can be found in four categories. The track lighting types are as follows: Standard Track Lighting As its name suggests, it is the conventional track lighting known to many individuals. Standard track lighting is the easiest to install and is usually connected to the ceiling using basic screws. The straight track rail is also popularly called linear track lighting because it’s one line of track with connected lighting. Swing Arm Track Lighting It frames only the track’s center, like a traditional lighting fixture. Segments of the track join near a pivot point. You can swing or move the segments to create zigzag or angled lighting designs. Monorail Track Lighting Monorail track lighting is unique because they are not connected through the ceiling; instead, they are dropped down from it. It is not mounted straight to the ceiling. Or rather, it swings from bars known as standoffs. They come in spiral patterns for a more structured feel. They’re usually low-voltage, but you can also find monorail patterns in 120 volts. Fixed Track Lighting Fixed track lighting is the track light type fixed to the wall rather than the ceiling itself. You can use fixed track lighting as a substitute for a typical bathroom vanity light. These have adaptable track heads, such as linear track lighting. Uses Of Track Lighting In Various Sectors When we talk about a track light, know that its uses are not limited to home only. In fact, track lighting has many uses in many sectors, including: Commercial Track Lighting Traditionally, trading track lighting is used in many business projects because of its versatility and convenience to adjust according to your requirements. Industrial Track Lighting As track lighting can be hung from the roof, it is also utilized in industrial projects for impressive lighting in high ceilings and key task-directed zones. Retail Track Lighting Retail track lighting is utilized to highlight store displays and upgrade the entire impression of the area. This kind of lighting features the quality and charm of the store items on offer. Residential Track Lighting You can install track lighting throughout the home to feature the family and art heirlooms. It can also be used as task lighting in spaces like the kitchen, bedrooms, and laundry. How Can You Mount Track Lighting? Before you decide to start your track lighting project, you should decide on the type of installation method you want for your space. There are various ways to mount track lighting, which include: Ceiling Track Lighting This is the simplest and most common method of installing track lighting. The tracks are directly screwed into the roof material and forced against the wall. This way is preferred to be convenient and cost-effective. Recessed Track Lighting The process of installing recessed track lighting is the same as

What Is Track Lighting, And How Do I Get It Installed? Read More »

What-Is-A-Light-Fixture-And-How-To-Replace-It

What Is A Light Fixture, And How To Replace It By Yourself?

Do you want to replace your light fixture at home?If yes, you should know what is a light fixture and how to replace it. Changing the fixture is extremely easy, and anyone can do it. With the right steps and knowledge, you can replace the lighting device in 30 minutes.  We will share information about light fixtures, their replacement costs, and the step-by-step DIY process of installation. After reading this blog, you will be able to replace the light fixture by yourself at home. We will also answer the question of whether you need an electrician or not for this process. What Is A Light Fixture? It is an electrical device that has an attachment to the bulb. Every light fixture contains one or more lamps for illumination. These fixtures are mainly of two types. The first one is wired and secured in one place. On the other hand, the second one has a socket that easily replaces it when it gets damaged.  It also has a switch that fits with the fixture body. A light fixture also has features like reflecting direct light, outer shell, and shades. These electrical devices attach to the wall as well as the ceiling.  Different Types Of Fixtures For Lighting There are various types of fixtures for lights available in the market. Moreover, you have multiple options to choose from as per your lighting needs. Here are the different types of fixtures available in the market: Track Light And Monorail Track lighting and Monorail are electrical systems consisting of lighting tracks. It has attachable elements in the form of LEDs and bulbs. The device allows you to place the electrical elements wherever you want on the track. Moreover, you can replace the fixture at any time with simple steps. Recessed Lighting It is a fixture that attaches to the ceiling. The recessed light doesn’t have any bump on its surface. This light fixture focuses a narrow band of light in one particular direction. So, you can use it to provide a good light intensity in one place. It is commonly used in the kitchen, living room, and bedroom. Table Lamps Table lamps are the common type of light fixture used in homes. It has a large shade and high-quality bulbs that provide good light intensity. This light fixture adds an aesthetic feel and is perfect for reading and decoration. In addition, table or floor lamps can be replaced or repaired easily at home. Chandeliers The chandelier is a large-size fixture that attaches to the ceiling. The whole body of this lighting fixture has multiple sockets for LED bulbs. The majority of people use chandeliers for decorating their living rooms and halls. However, the replacement of this fixture needs professional assistance. Due to its complex design, it is harder to replace. Sconces Fixture Sconces are widely used as a wall-mounting fixture to illuminate a particular area. When you use it for outdoor purposes, the sconces are more likely to get damaged. That’s why these light fixtures need replacement from time to time. Some popular areas of their use are bathrooms, dining rooms, living rooms, and lounges. Signs Your Light Fixtures Need Replacement It isn’t easy to find out when the light fixtures need replacement. Most people are confused about whether they should replace or repair their lighting fixtures. If you don’t know when your lights need replacement, here are the signs you need to notice: Poor Lighting If your lighting fixture provides poor or dim light, it needs replacement. The main reason behind this is the bulb, but an internal defect in the fixture can also cause it. One of the easiest ways to check it is to replace the bulb. Even after the bulb replacement, if you still notice poor lighting, then the problem is with your fixture. Consumes More Power The older model of fixtures consumes more power. As a result, people receive high energy bills. One of the biggest reasons is the outdated bulbs and wires used in the fixtures. Moreover, you can decrease energy consumption by simply replacing your light fixtures. Another advantage of using new fixtures is less impact on the environment. So, the higher energy bills indicate that your light fixtures need replacement. It Looks Bad With Your Home’s Interior Lighting products are also used to decorate the space. The type of fixture you use also shows your personality. When you upgrade the interiors of the space, the light fixture also needs replacement.  For example, traditional lighting fixtures look bad with modern furniture. You can easily transform each room by changing the fixtures. In addition, the right lighting product can accentuate your space with cast shadows. Broken Fixture A broken fixture indicates that it needs replacement, not repair. So you don’t have to waste your time and money repairing the fixture. If your light fixture falls accidentally, it may damage internally and externally. As a result, it stops working and rarely works fine even after repair. In such a case, you must replace it with a new fixture. Cause Safety Risks It is true that old light fixtures easily short out and create higher safety risks. You should not take any further risk in such a situation. Hire the electrician to replace all the damaged light fixtures and ensure everyone’s safety. We will never suggest you replace the lighting appliance by yourself if it has caused a short circuit in the past. How Do I Replace The Light Fixture By Myself? Anyone can replace the light fixture with the help of some basic tools and instructions. This step-by-step guide is for you, even if you have basic knowledge about light appliances. Before we show you the steps, let’s see what you need to complete the fixture replacement process. Time Required: 1-2 hours (based on your expertise) Project Type: Do It Yourself (DIY) Tools you will need to replace the fixture Here is the list of tools you will need to replace the light fixture: Screwdriver Wire Cutter Ladder

What Is A Light Fixture, And How To Replace It By Yourself? Read More »

lamp-rewired

Where Can I Get A Lamp Rewired, And What Will Be The Cost Of It?

Table or Floor lamps can last long for years in great working order. But ultimately, they need to be rewired sometime. It may be necessary to rewire the lamp due to abuse from pets and little kids or excessive use over time. Rewiring a lamp is a basic project that can renew your lamp and give it a new look again. But the only question is, where can I get a lamp rewired, and what will be the cost of it? Lamp Rewiring is a simple procedure of changing the old and damaged lamp wire to the new one. This can be done while repairing a damaged lamp or upgrading an old lamp. Why Should I Get My Lamp Rewired? Make your lamp more energy-saving.  Improve the light quality that your lamp releases. Make your lamp secure to use.  Elongate the life of your lamp.  Make your lamp more aesthetically nice. How To Rewire A Lamp? Here is the step-by-step guide to lamp rewiring. Disconnect The Power The first step is disconnecting the power plug from the socket. Never start any work while connecting the lamp.  Remove The Bulb Detach the cover, unscrew the bulb, and press the switch’s socket shell to divide the shell and cardboard insulator from the socket cap. Don’t use the screwdriver to pry the socket aside if you are thinking of reusing the socket. Take out the socket from the shell as long as the connected cables permit. If this is not giving you sufficient cables to work with, knock the cord up from the lamp’s bottom for more slack. Remove The Socket, Slacken the terminal screws of the socket, and eliminate the cord wires from below them. If it is a small-sized lamp, the cord travels in a straight track, glides the old cable out, and sustains the new cable from either end to the other. If the old cord provides any resistance at all, don’t pull on it. Check if you can deconstruct the lamp for easy removal. Also, ensure that the cord is attached in a twist to sustain it from being drawn out at its foot. Cut The Power Cord Cut about 12 inches of wire from the base of the lamp to remove the tight cord. Then, cut the two conductors of the wires separately and shred around an inch of insulation away from the ends. Similarly, do this to the end of a new cord’s length. Twist old, and new bare conductor ends together and turns twists set across the cord. Enclose electrical tape nearly around the splice. Draw the old wire from the fixture’s top, and work the newest wire through; at a similar time, push on the new wire from the base. Hook off the old cord when you have enough new wire by the top. Read More:- Guide On Lamp Restoration Service Remove The Insulation Once you move the new wire by the lamp, cut the end, so you have around 3 inches of parted conductors. Use a cord stripper tool to cut the insulation of around 3/4 inch from the conductor’s every end, then spin the strings of each together. And also, be cautious not to cut strings when you strip insulation. Fix Wires To The Terminal Now curve the turned end of every wire into a clockwise coil, and set each coil below the socket’s terminal screw with the loop twined clockwise near the screw, then tighten the terminal screws. A clockwise coil will place the cords tighter below the screw head as each screw is tightened.  Hook off the surplus uncovered cords with diagonal cutters. Every uninsulated wire must be under screw heads, with no loose strands or exposed bare wire. If bare wire is visible below bolt heads, unscrew terminals, detach wires, and make a link again. Fix The Insulator Glide the socket covering above the insulator, and slide the insulator and shell above the socket. Then split the socket and shell into the cap.  Fix The Plug Place a quick-fixing plug on another end of the wire. Twig the wire’s end into the hole on the plug’s side and press down on the top lever. Metal points inside the plug will be held by the wire’s insulation, shredding copper cords to make an electrical relation. If you utilize a screw-type plug, arrange cord ends like you did when building socket screw connections, and then twist them together. Coil each cord around the plug’s point before tightening the uncovered end below the screw head. Loops and knots keep cords from involuntarily touching each other. Also, pulling on the cord makes it harder to slacken connections. Reassemble The Lamp Tighten cords under the screw top, and hook off any surplus uninsulated conductor prior to the plug-in lamp. Why Hire A Professional For Your Lamp Rewiring? Here are the reasons to know the importance of hiring a repair professional for your lamp to rewire needs. Responsibility Of Loss Sometimes, just to save your bucks, you do the lamp rewiring on your own, but it results drastically worse because of a lack of knowledge, and it takes much more money than you expected to repair it. But in the presence of a trained lamp professional, you don’t have to worry about such loss. And if there is any loss, you will not be responsible for compensating for it. The lamp professionals will be answerable in such situations. Safety Measures  The Lamp experts take all caution while rewiring the lamp. They are verified, and that’s why they complete their job in a very disciplined and safe manner. No matter if the purpose of hiring them is minor or major, they will complete it with all care. Surety Bond The major benefit of hiring lamp professionals for lamp rewiring is that they will assure your money security. It means that in case of bad service or if the problems come from their end, you will not pay any charges for such services. But it is also true

Where Can I Get A Lamp Rewired, And What Will Be The Cost Of It? Read More »

Product Enquiry